MAKING OF - JACK PURCELL CONVERSE SHOE
My Final comp render for my personal project "Jack Purcell Converse Shoe".
Hi Guys ! I know it has been a while since I finished this personal piece, but I would like to share with you guys my process. I hope this will be really helpful for you that are starting your career in 3D, and trying to find the best way to learn. So, I will try my best to share as much as possible on how I did this project!
01 - PREPARATION
Right after I finished my school project at VFS, "Singing in The Rain", I got a suggestion from people that it would be better for me to try make a personal piece, trying to be as simple as possible, but achieving a result that is as realistic as possible. I should almost diminish the differences between the render and the reference image. Hearing that, I felt like I just wanted to do that because it would be such a really good thing to learn, to just spent my time in learning, trying to get as much detail as possible into such a simple prop.
After some time of thinking, I decided to do this personal work using my own shoe as my reference. It is always good to have your own live reference, rather than just photos from the internet. There are so many things that you miss in that photo, how the subsurface works, how the piece is assembled, where the seam is, etc. So if you are starting, I would really recommend to just use your own personal prop as a reference.
Before starting a project, it is always best to gather references. You may think that it would be just such a waste of time, but actually gathering references ahead would help you guys a lot in the progress afterwards! You will make fewer mistakes and get the result that you desire quicker.
Here is the list of references that I gather :
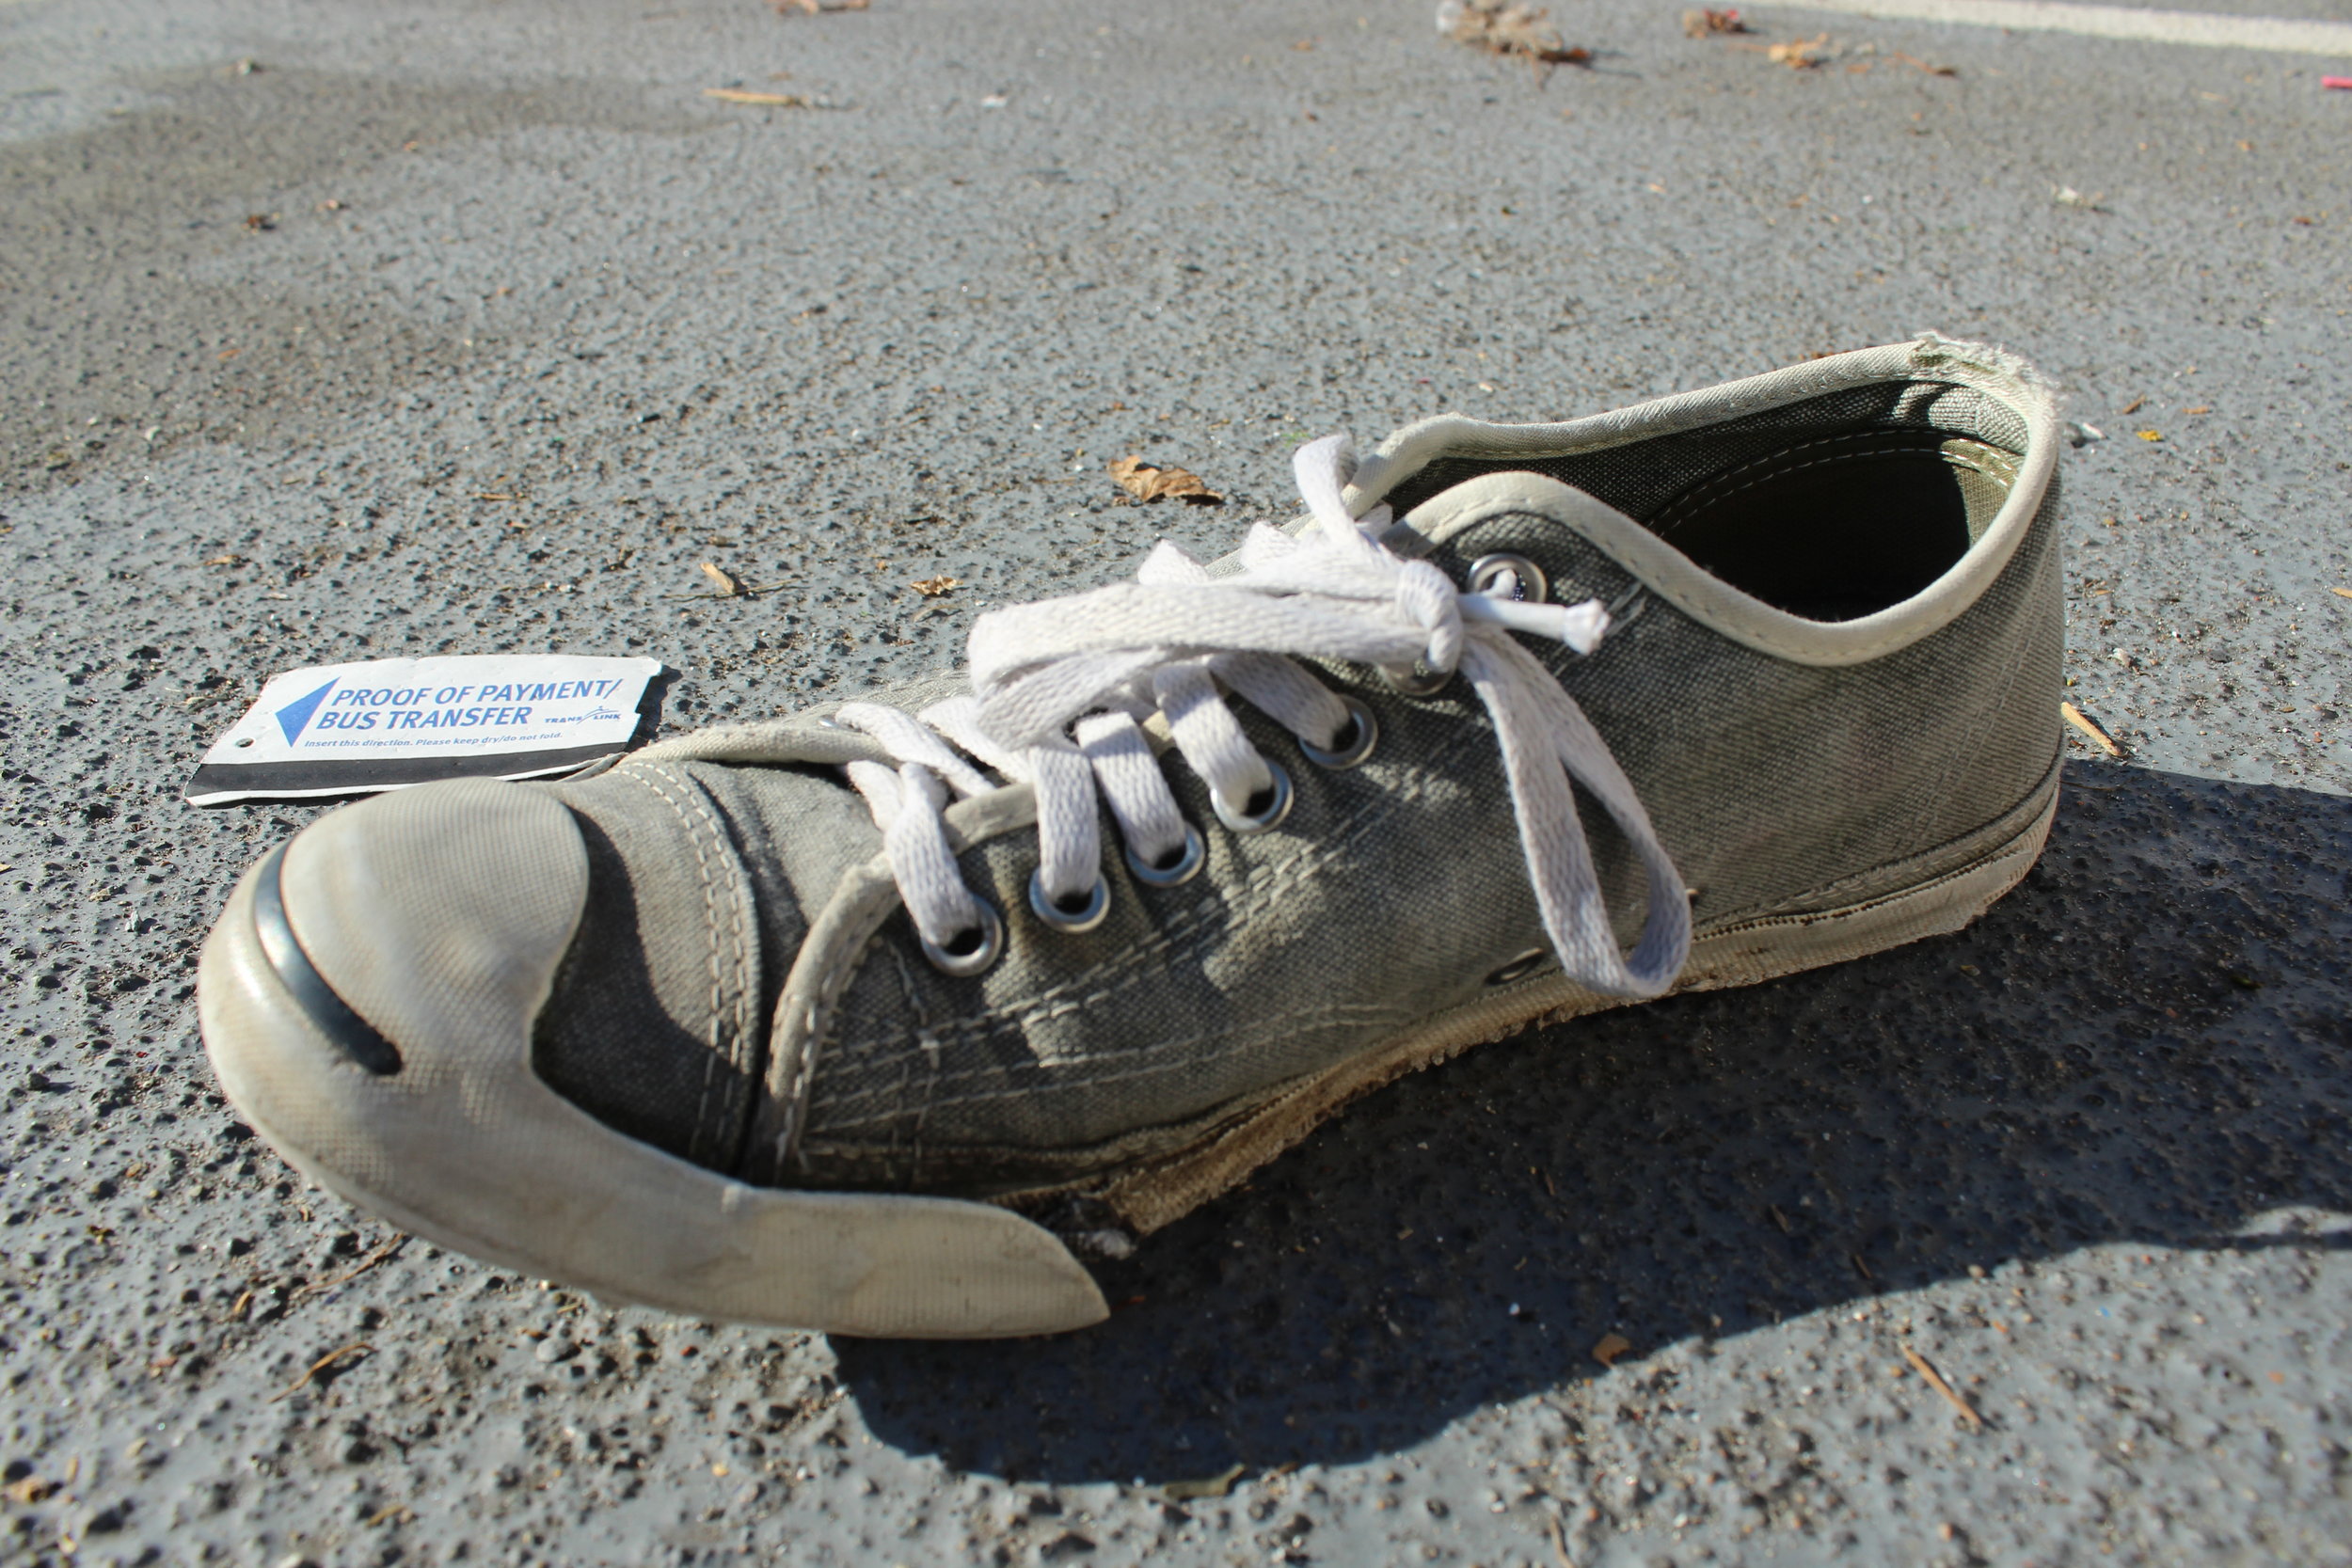
- Your own personal prop photos in a composition that you like.
- Same composition as above, but without the prop, so later you can integrate the CG in nuke.
- Camera & Tripod / Nodal Ninja to make your own HDRI so that it would match your reference images. For this one I used PTGui to stitch all of the images in different exposures so that I can get a full range of the HDRI that I make
- Chrome Ball / Gray Ball - It would be really good if you can borrow or get one somewhere, it helps you to match the lighting condition so that it integrates well.
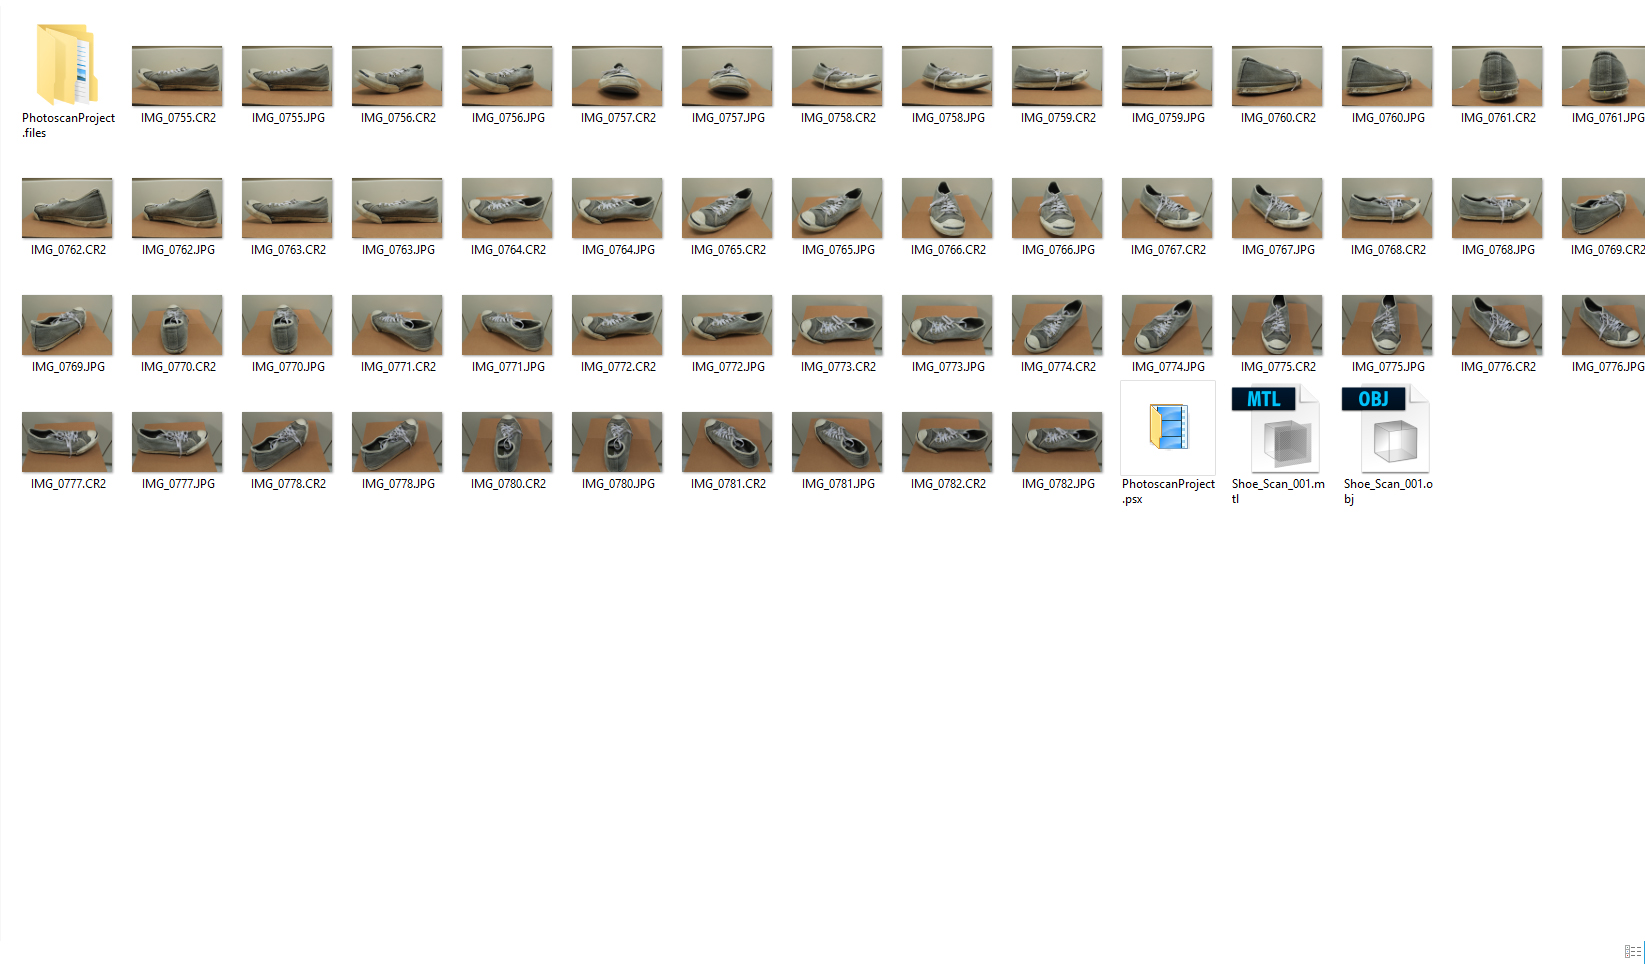
- Collection of reference pictures of your personal prop for references, or furthermore you can use it for a 3D Scan so you can get the overall shape quicker, and still accurate.
All of those are represented in the image below:

02 - MODELING
And lets start with modeling before going to the fun part ! For this project, first I tried to use photoscanned object as a base (it is just a really rough one, will be shown in the pictures below), since I had never done that before. After that I did retopo, trying to make all of the lineflow as nice as possible. Afterwards I just did a major displacement in Zbrush, using the scanned geo as a reference.


03 - UV & TEXTURING
And finally the really interesting part comes ! Personally somehow I really like to make my own UVs (knowing a lot of people really don't like it). Anyway. In UV-ing , always try to think how close your shot will be, how big is the resolution of your render, and then try to make the layout so that you can get most of the resolution right away. Below there would be an image and in this case I was trying to measure the resolution if my render would be 1920x1080p,so:
- In the first image, I tried to measure that side on the render, everything is just a rough measurement.
- In the second image, I tried to measure the size of the UVs so if I set the patch to 1K, the UV shell would be roughly 1024x 300px, and in 2k it would be 2048 x 600px
*I know I read some article before that someone doubled the resolution of the UV so nothing would be low in resolution, but at the sametime would give a crisp look to it as well, so just a good thing to know!


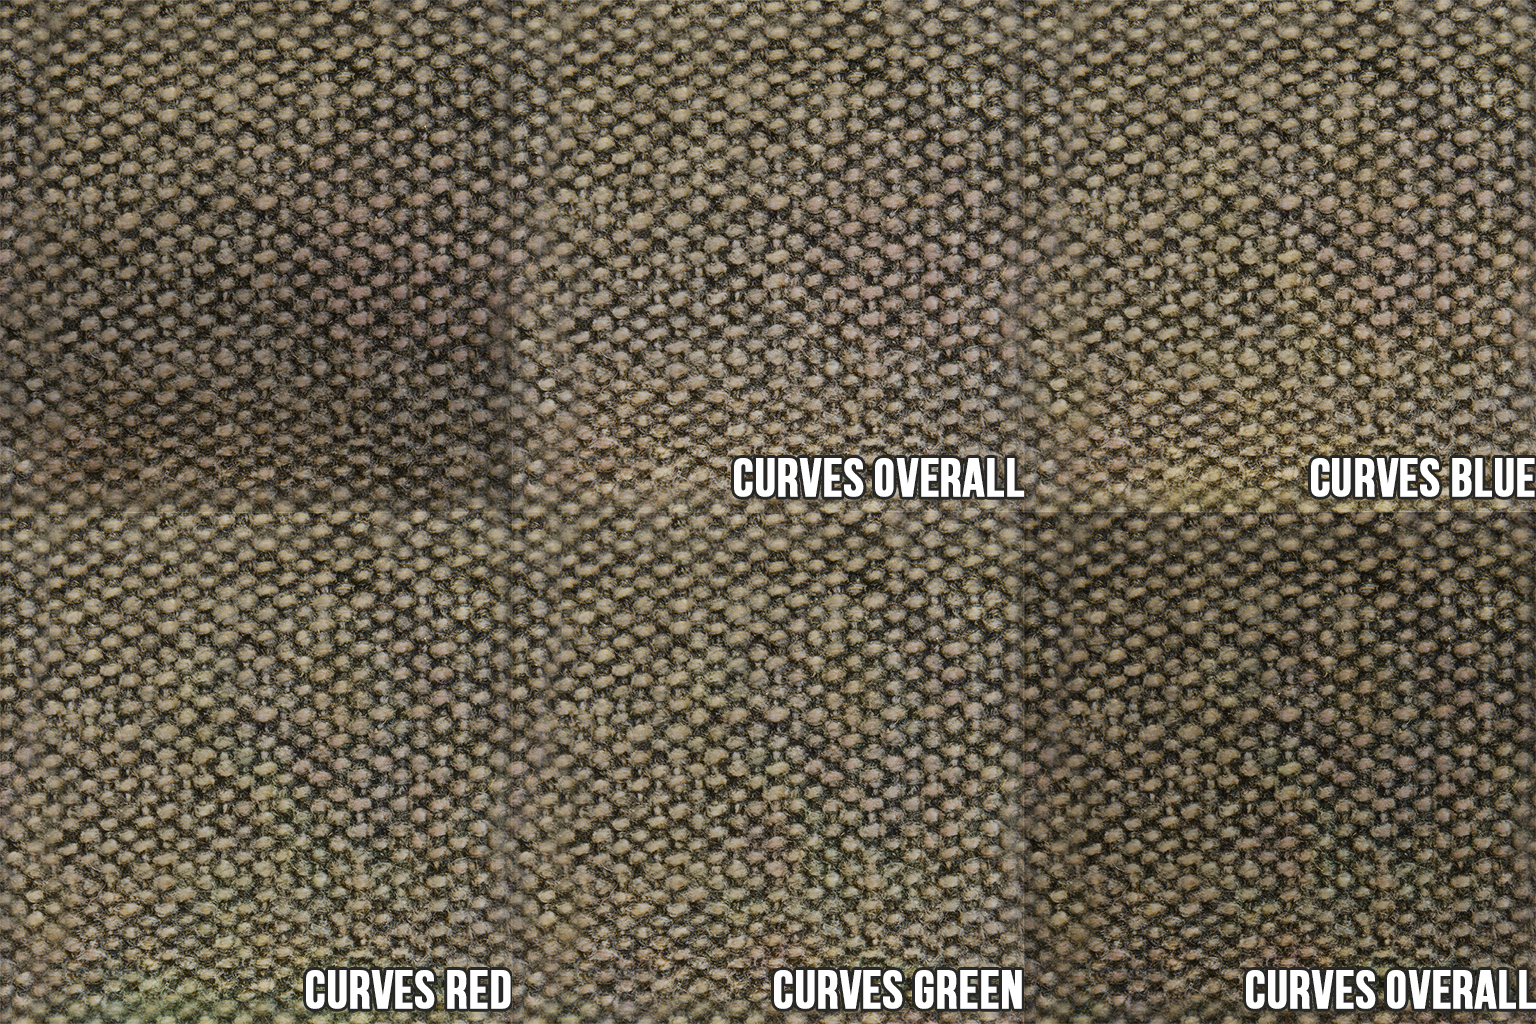
After I have done doing UV's, I went with texturing ! For this one, I used Mari for all of the textures. I used a photo from my own prop as well to do most of the textures. When you are preparing your own textures, always clean it up first, make sure that there are no shadows or light that is affecting the textures, because if we are painting a diffuse map, we don't want to have a fake shadow or ambient light in our textures. Below shows how I did it in photoshop, I started with Curves adjustment with mask to roughly make the value similar, and then I did another curves for each RGB channels.
The process of how I cleaned up the textures that I took from my camera.
Beforehand, I tried to bake Ambient Occlusion, Curvature map by using the Modo Render feature at Mari, so that it helps speed up the texturing process. I did bake cavity maps, peak and valleys map for some of the objects using Zbrush. There is a good article for this by Paul H. Paulino here. Make sure to check all of his stuff and articles as well!!


DIFFUSE
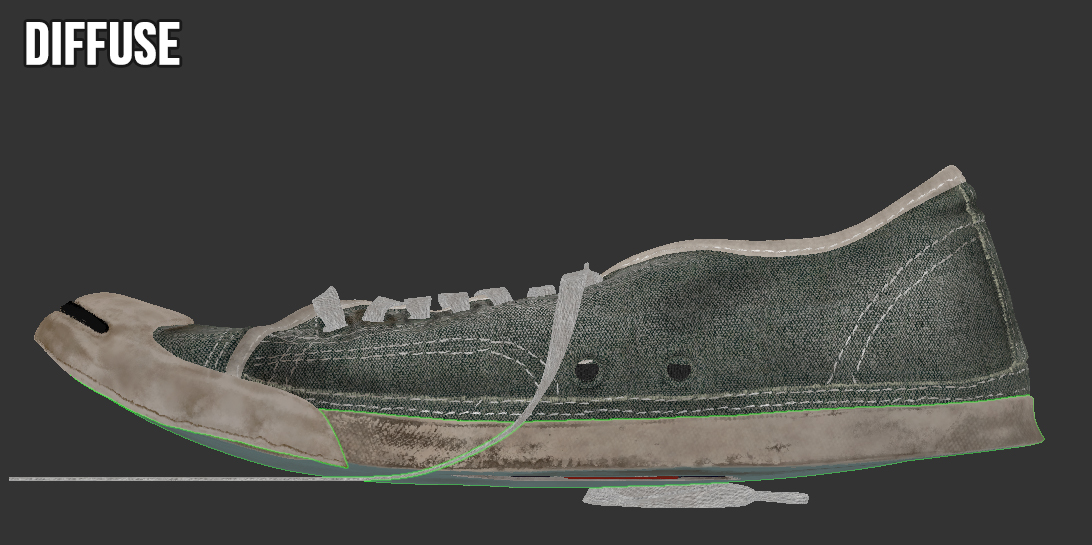
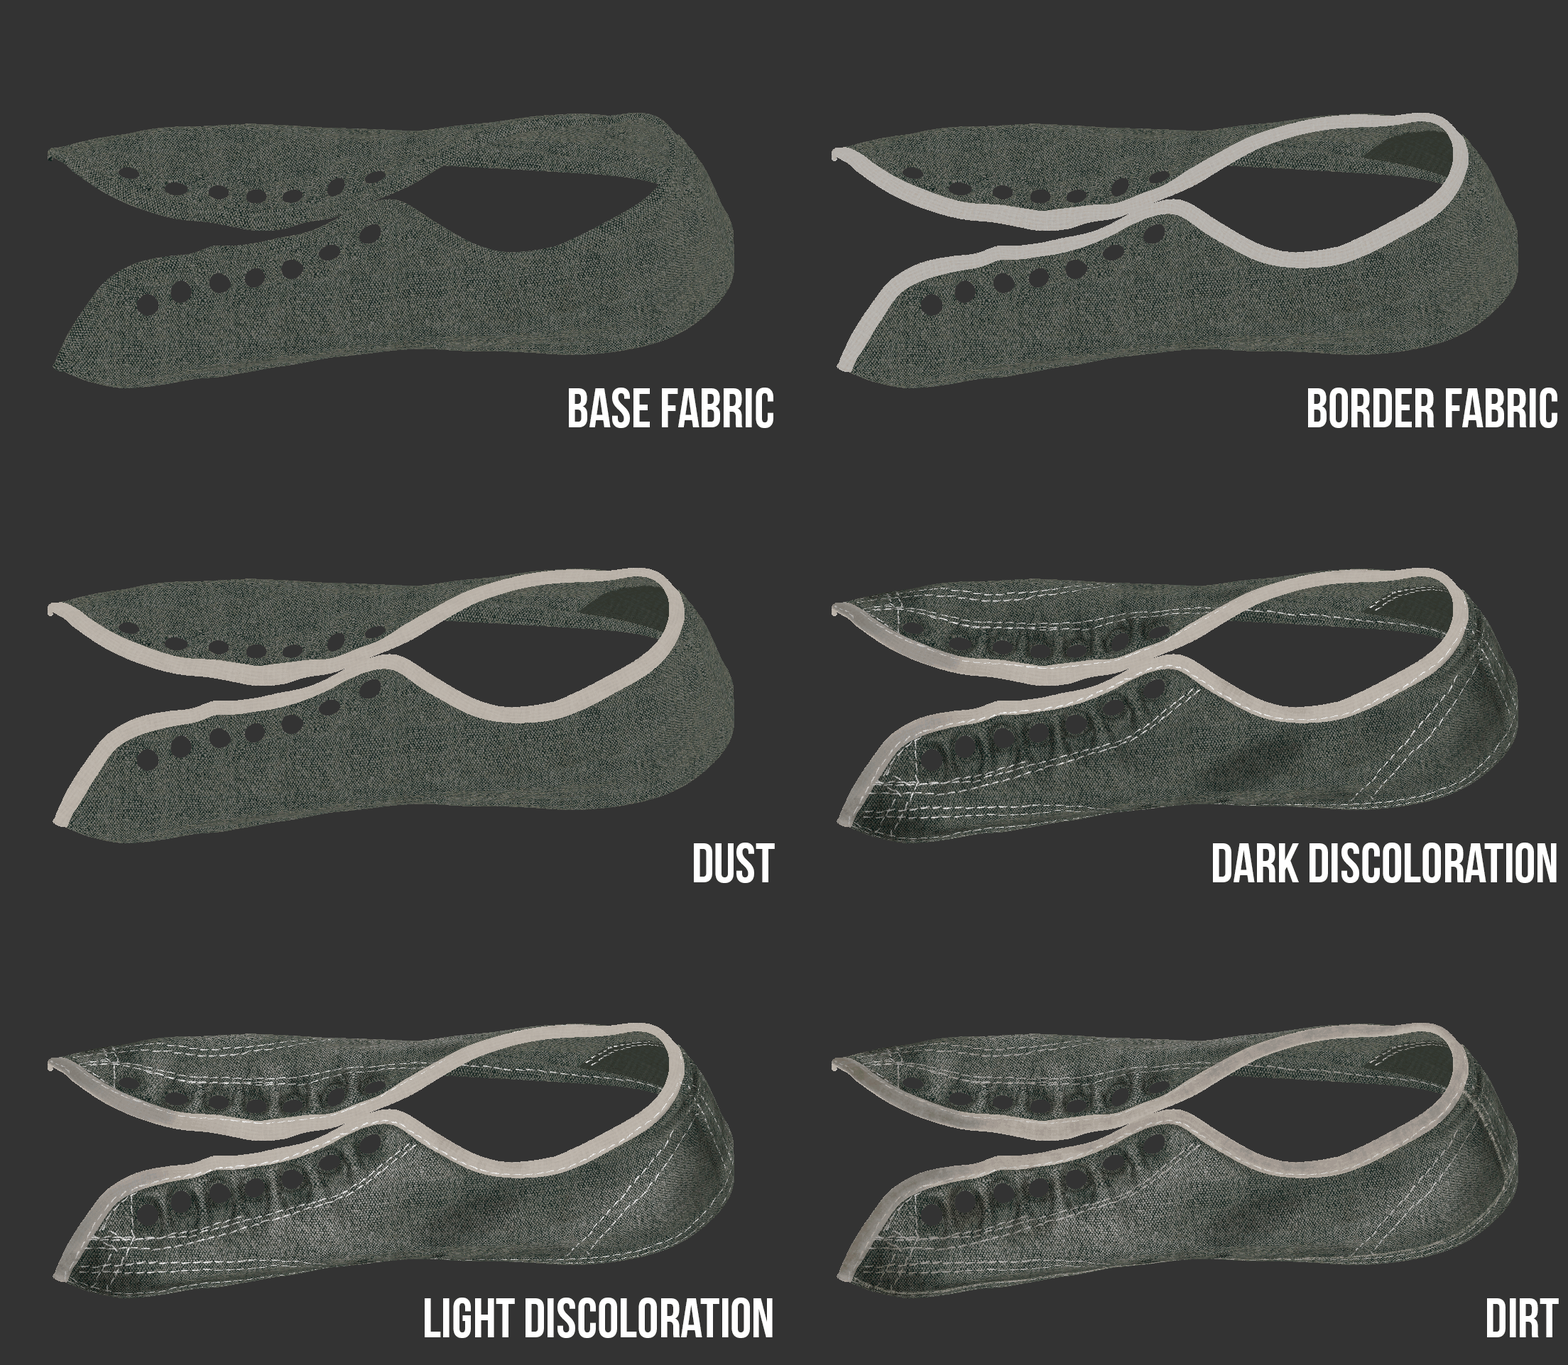
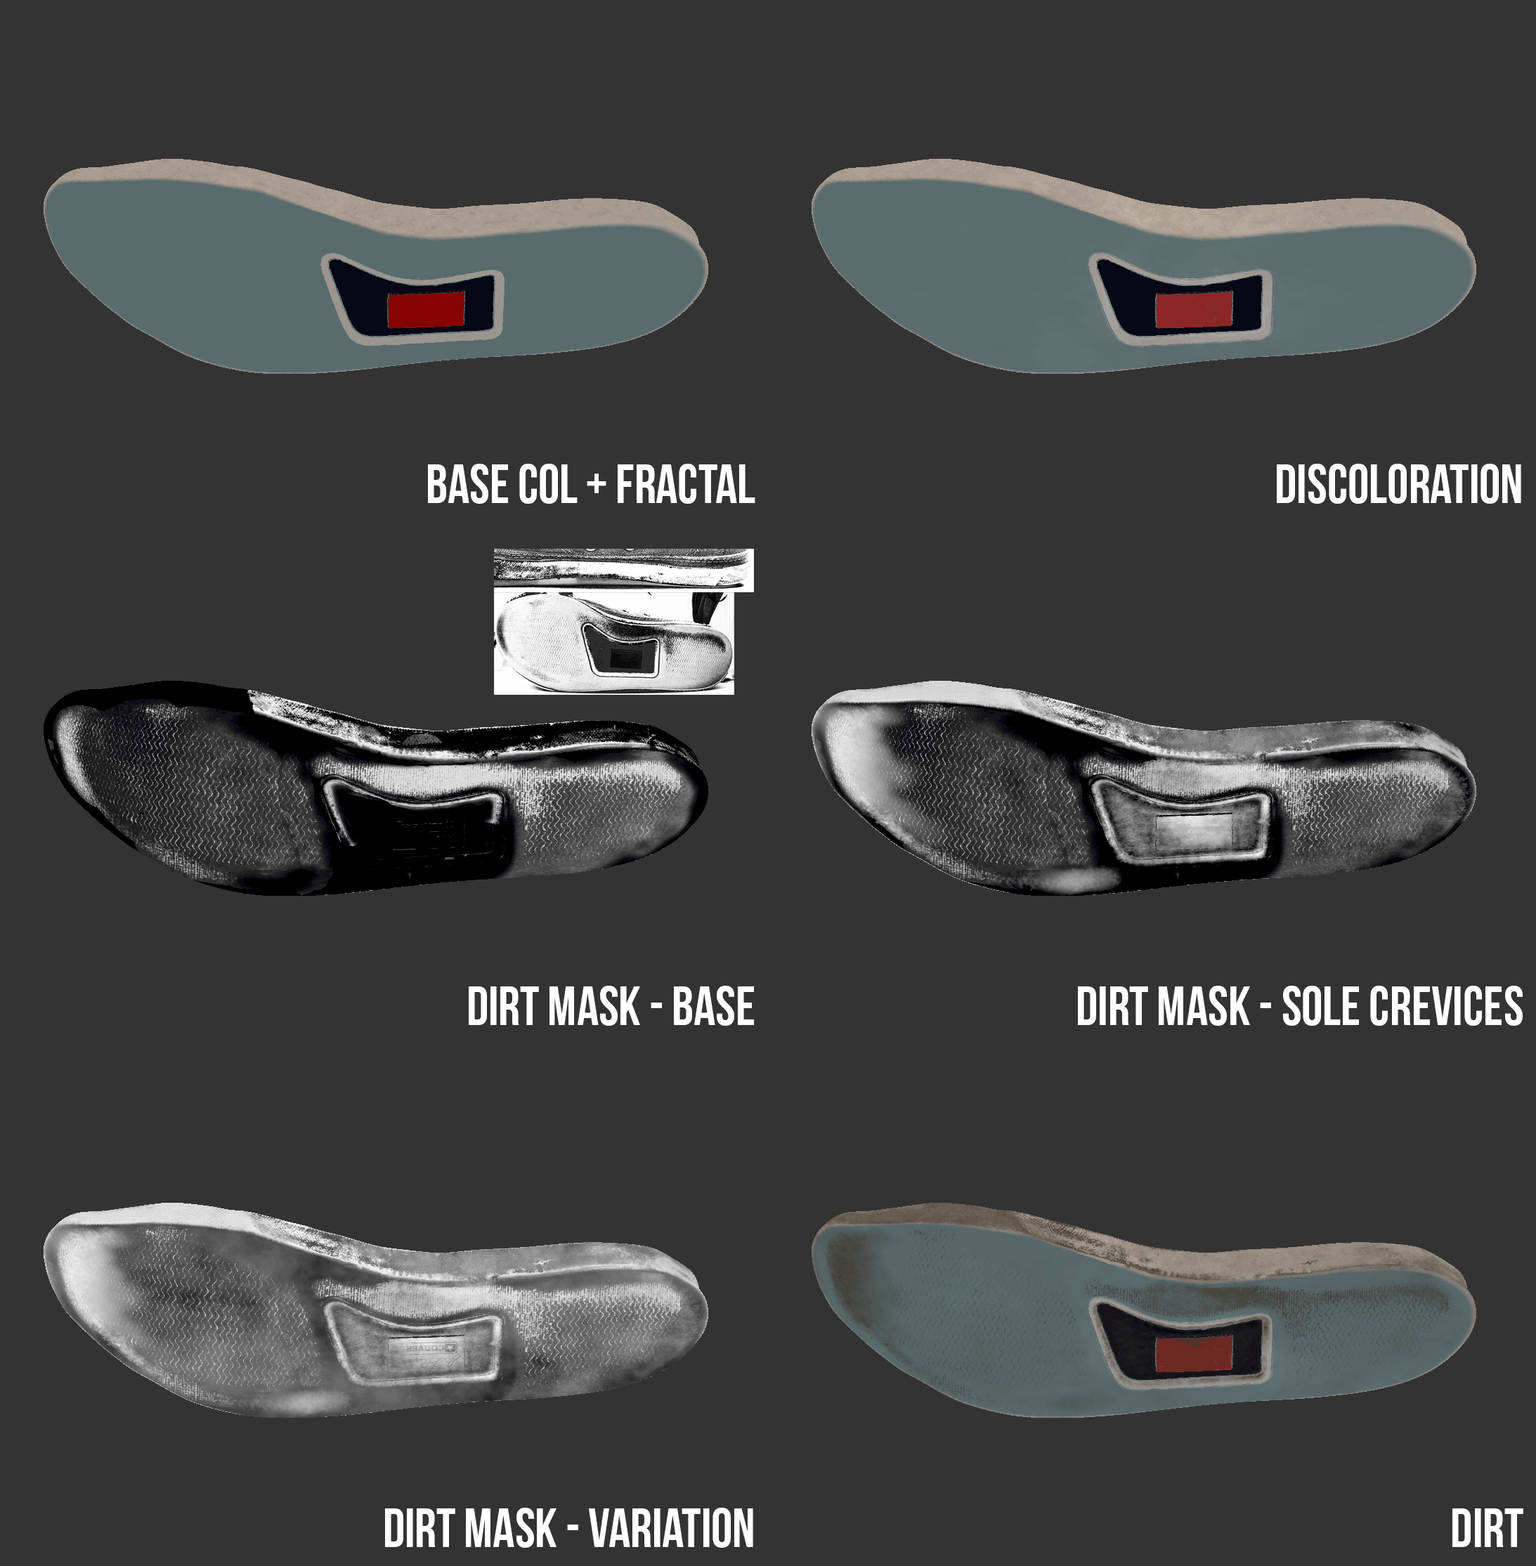
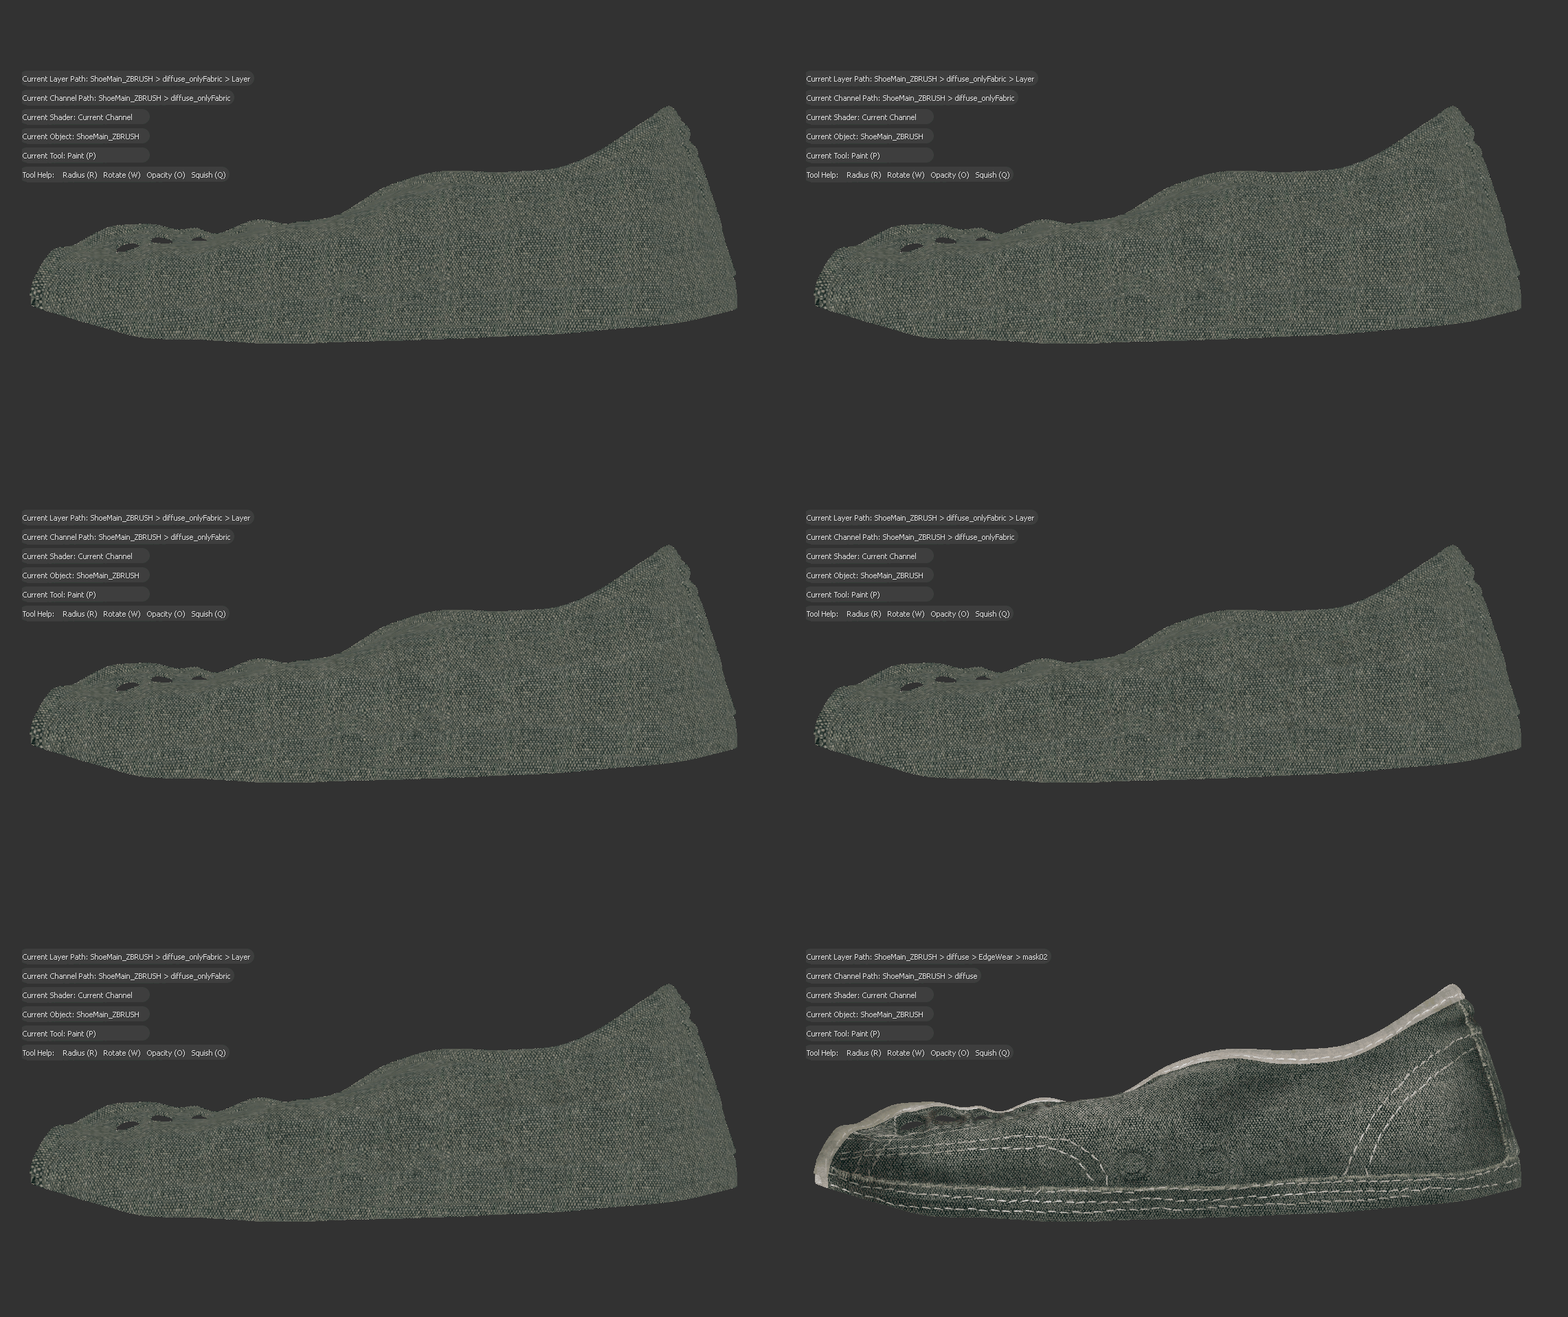
For diffuse, I started with procedural textures that I've made from photos that have been cleaned up. After that I did an overlay layer with really low opacity so that it just helps to break up the actual clean textures.(thanks to my friend Emily Belanger for that ! make sure to check her website here!) ! . Then, I painted the stitches, broken edge part, and then discoloration and grime after.
For grime in fabric, I prefer to use a mask from the base that has been tweaked, and inverted. Imagine that in the fabric the grime should be more in the crevices in between the threads in the fabric. Whereas in soles, I made a mask based on photos, so that later I could project it for my displacement as well.
•SPECULAR/ROUGHNESS
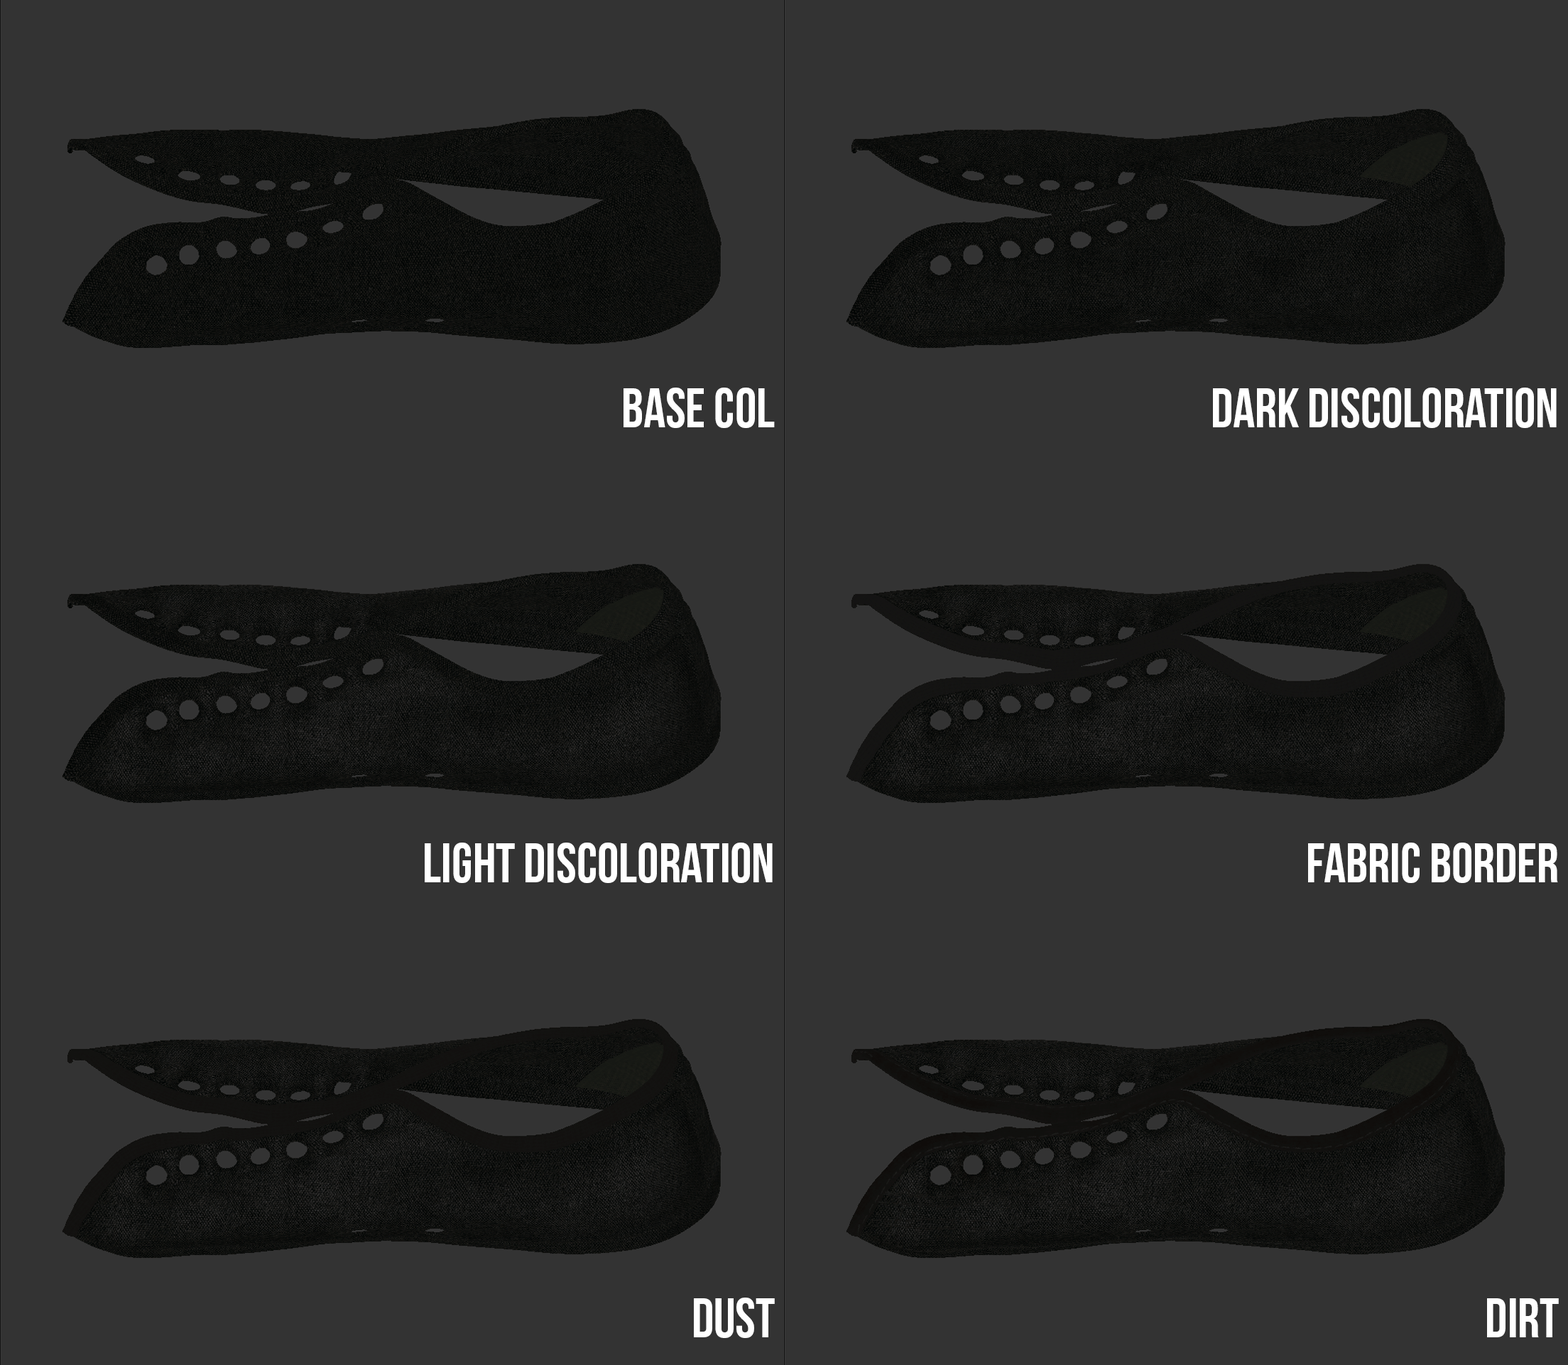
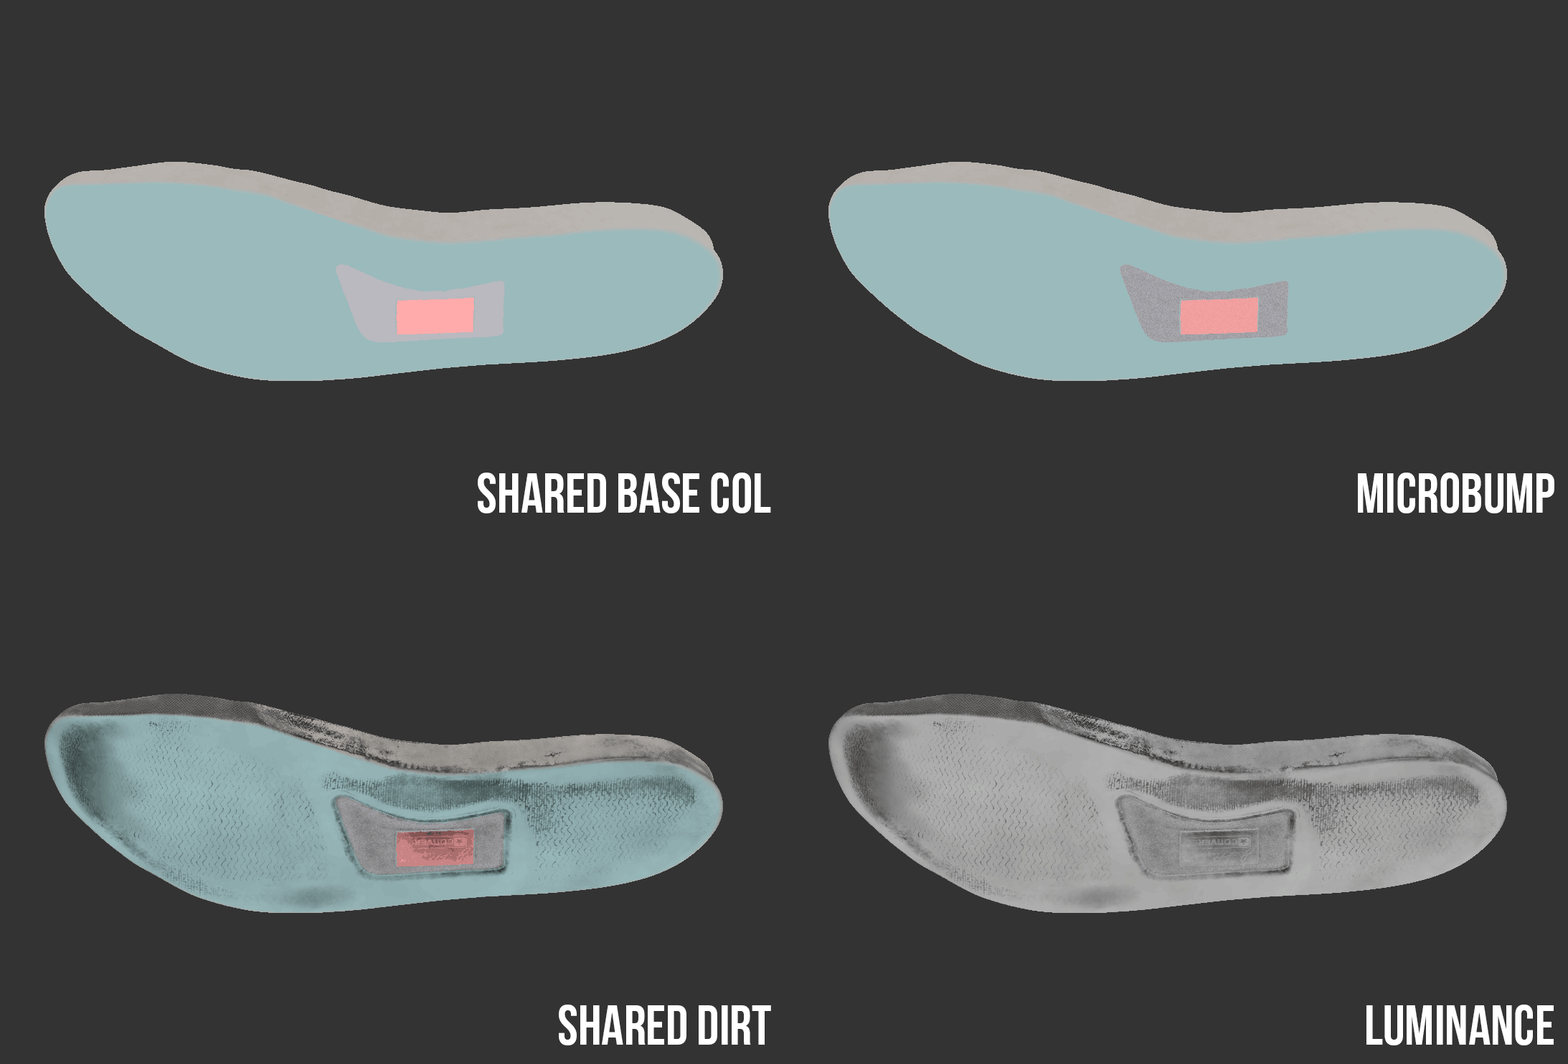
For specular/roughness, I shared layers from my diffuse,and then I did some adjustment from each component, so there would be a breakup in the spec. For this one, I did a method where I only used 1 map for both, and did some tweaking with PxrInvert and PxrColorCorrect in the shader itself.
•DISPLACEMENT
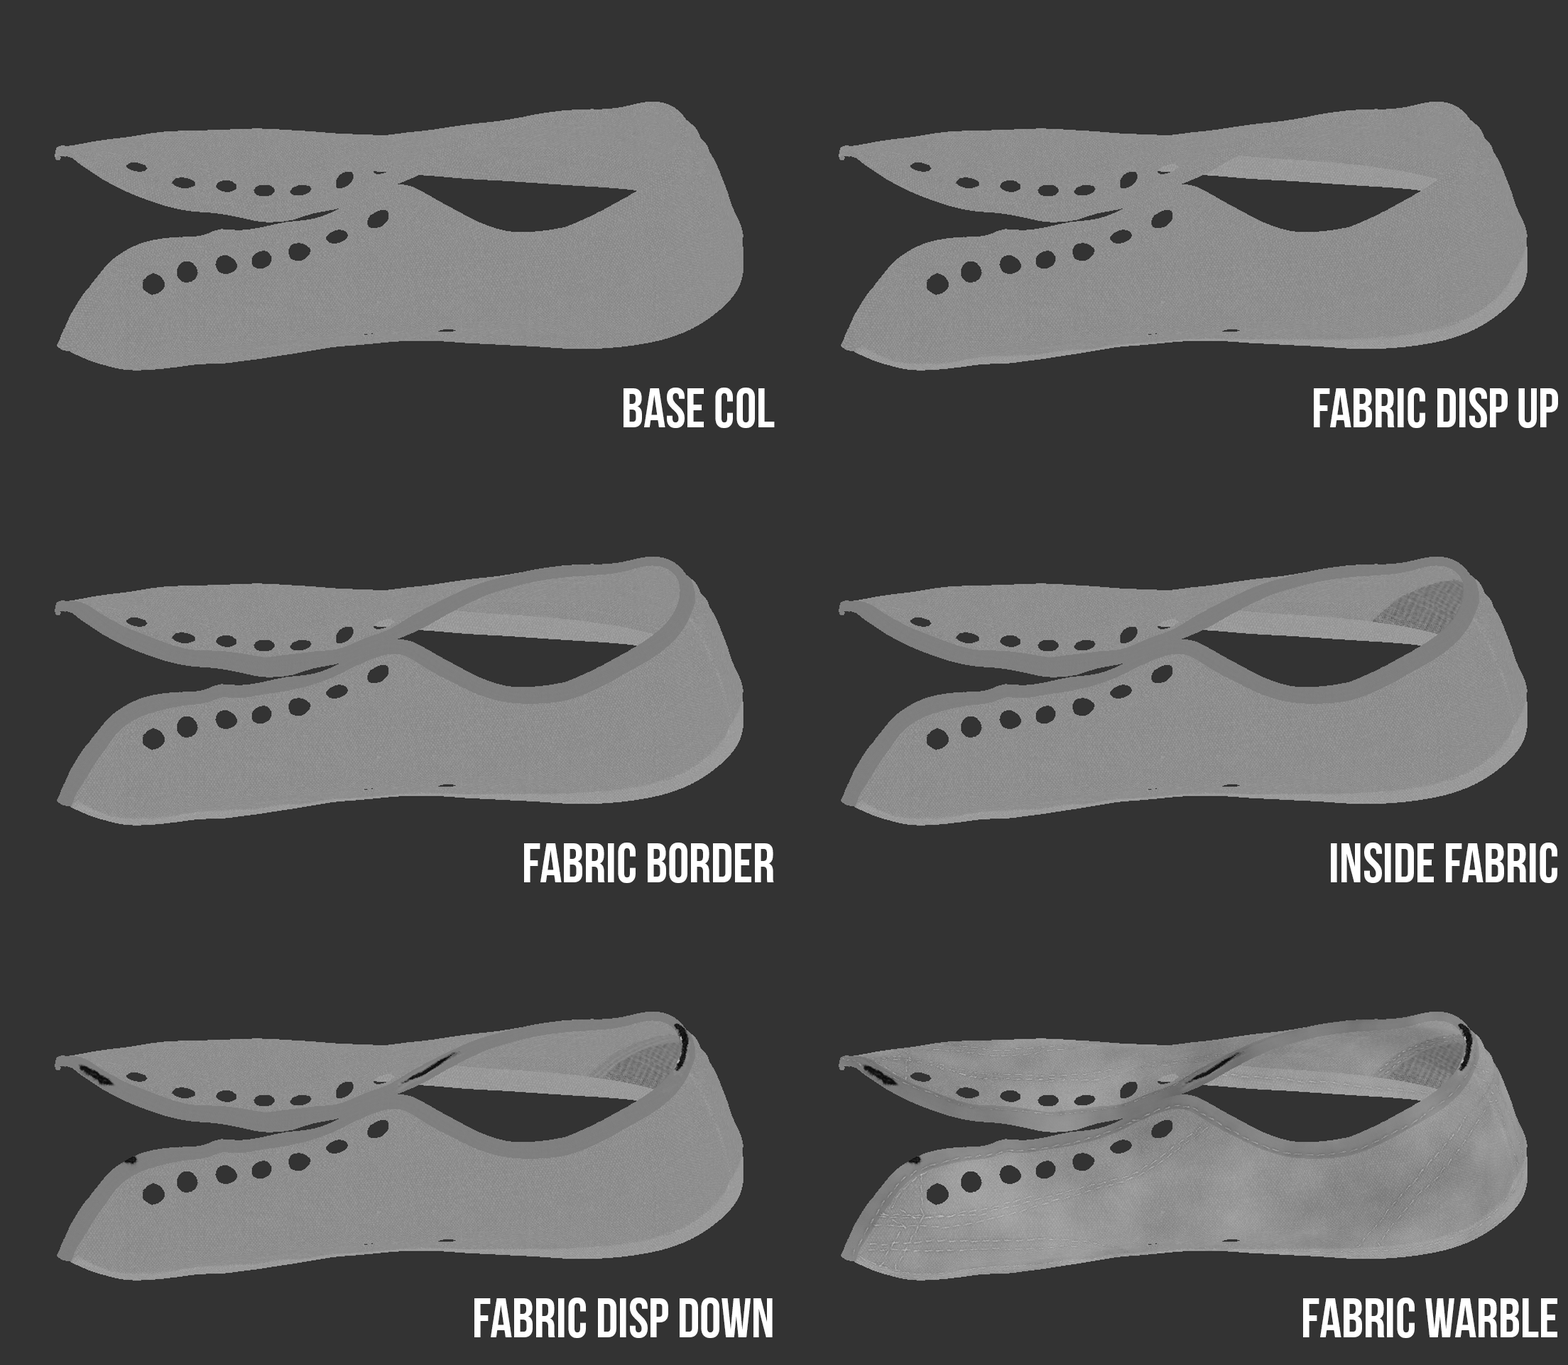
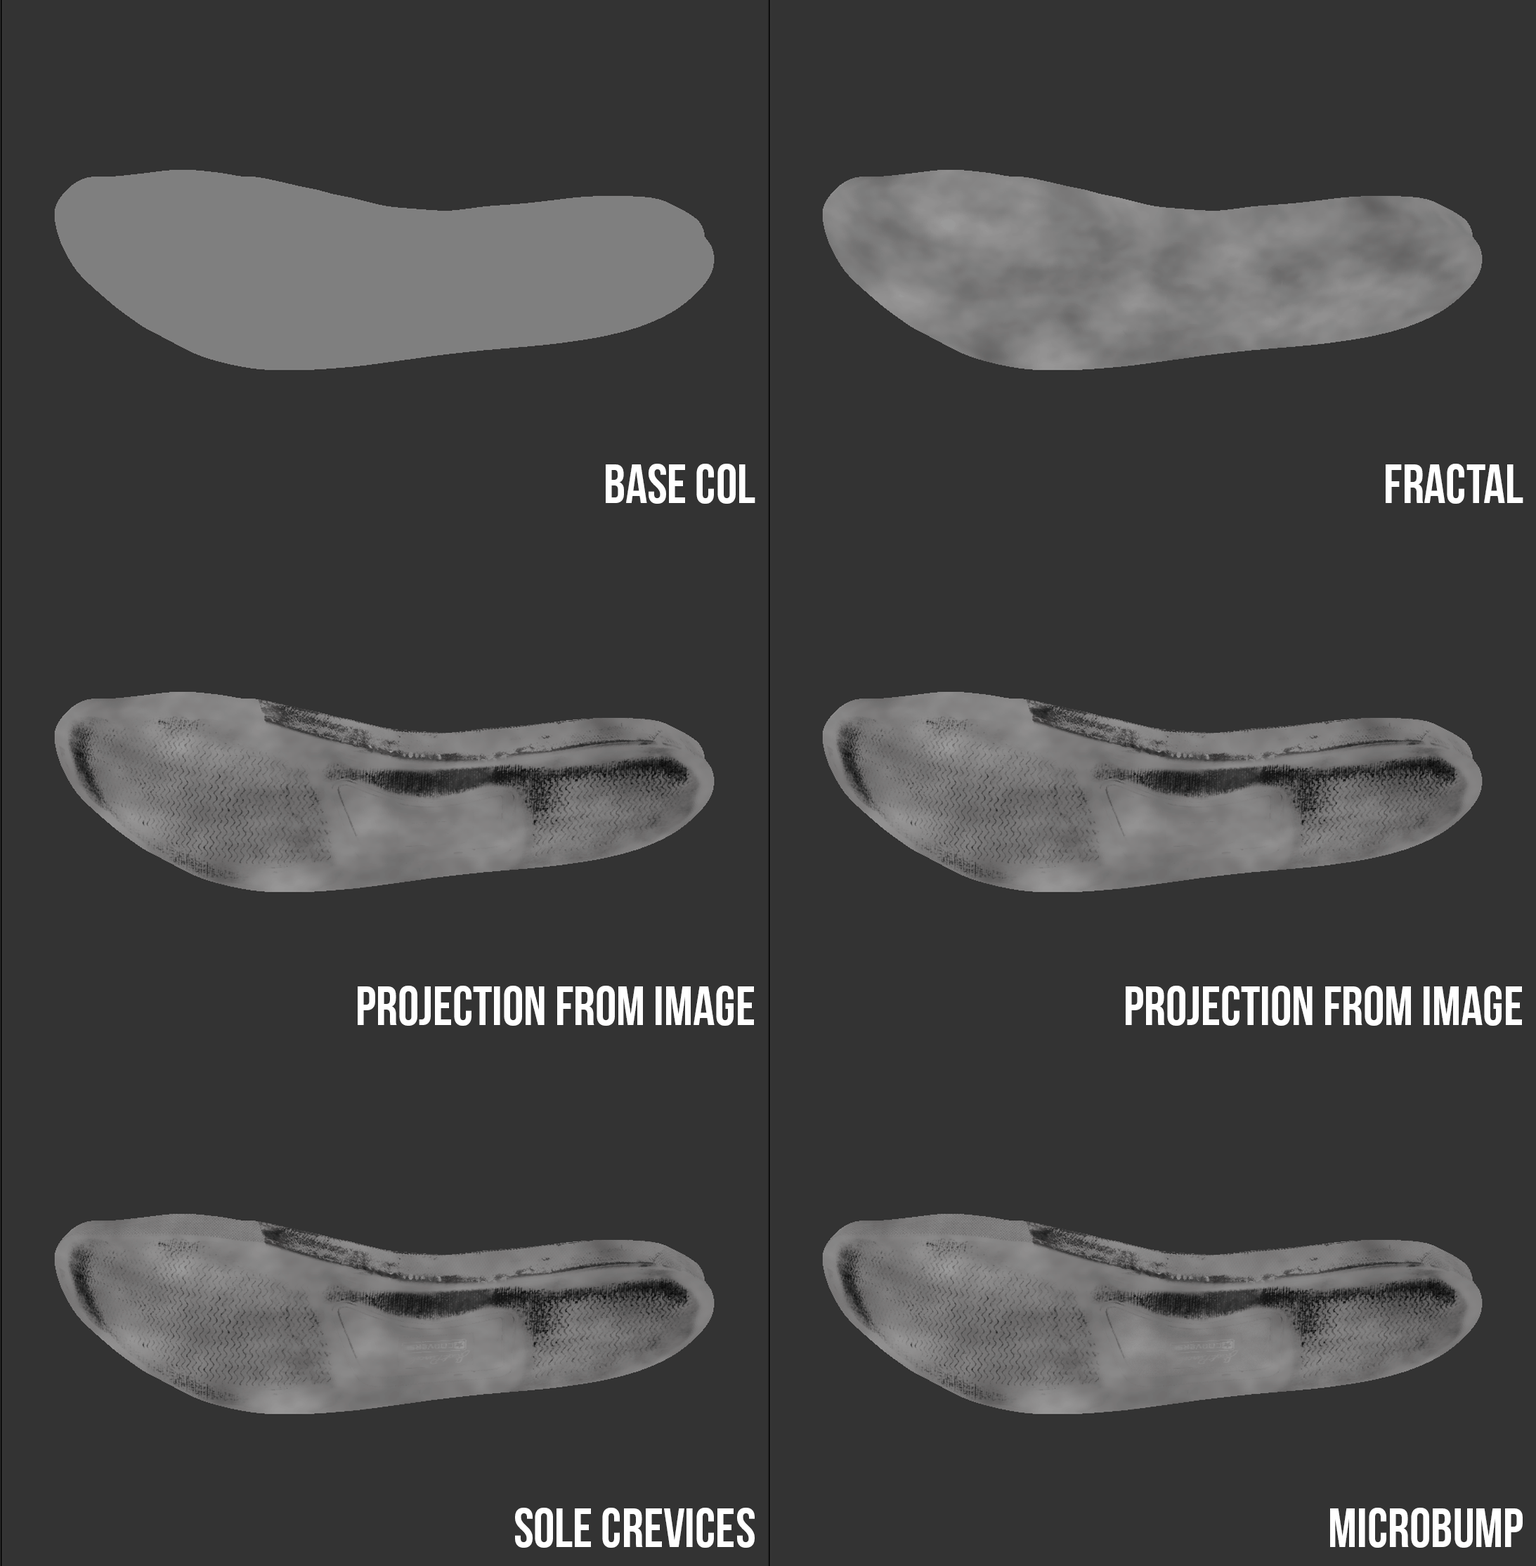
For displacement, I did the same thing, sharing the layers from my diffuse.I reused some of the overlays to make the breakups in the displacement more apparent. And in MARI, for this one I didn't paint any of the major displacement since I am combining with the displacement that I got from Zbrush as well.
04 - LOOK DEVELOPMENT
After I have finished my textures, I checked how it works in the shader. Beforehand, I prepared the shot camera, turntable camera, and checked if my HDRI is doing the right thing or not. For my case, I comped my HDRI subtly in nuke, which added precision in my render, which is shown below.

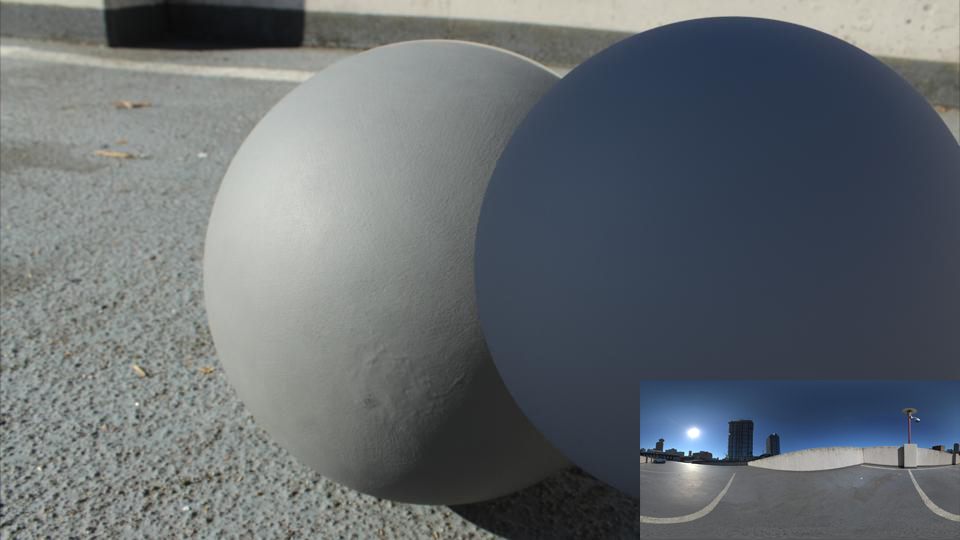
After I have settled with the lighting, finally I moved into shading of the shoe itself, for this I used a texture-dependent method, which was not a layered material. It was rendered in Renderman.
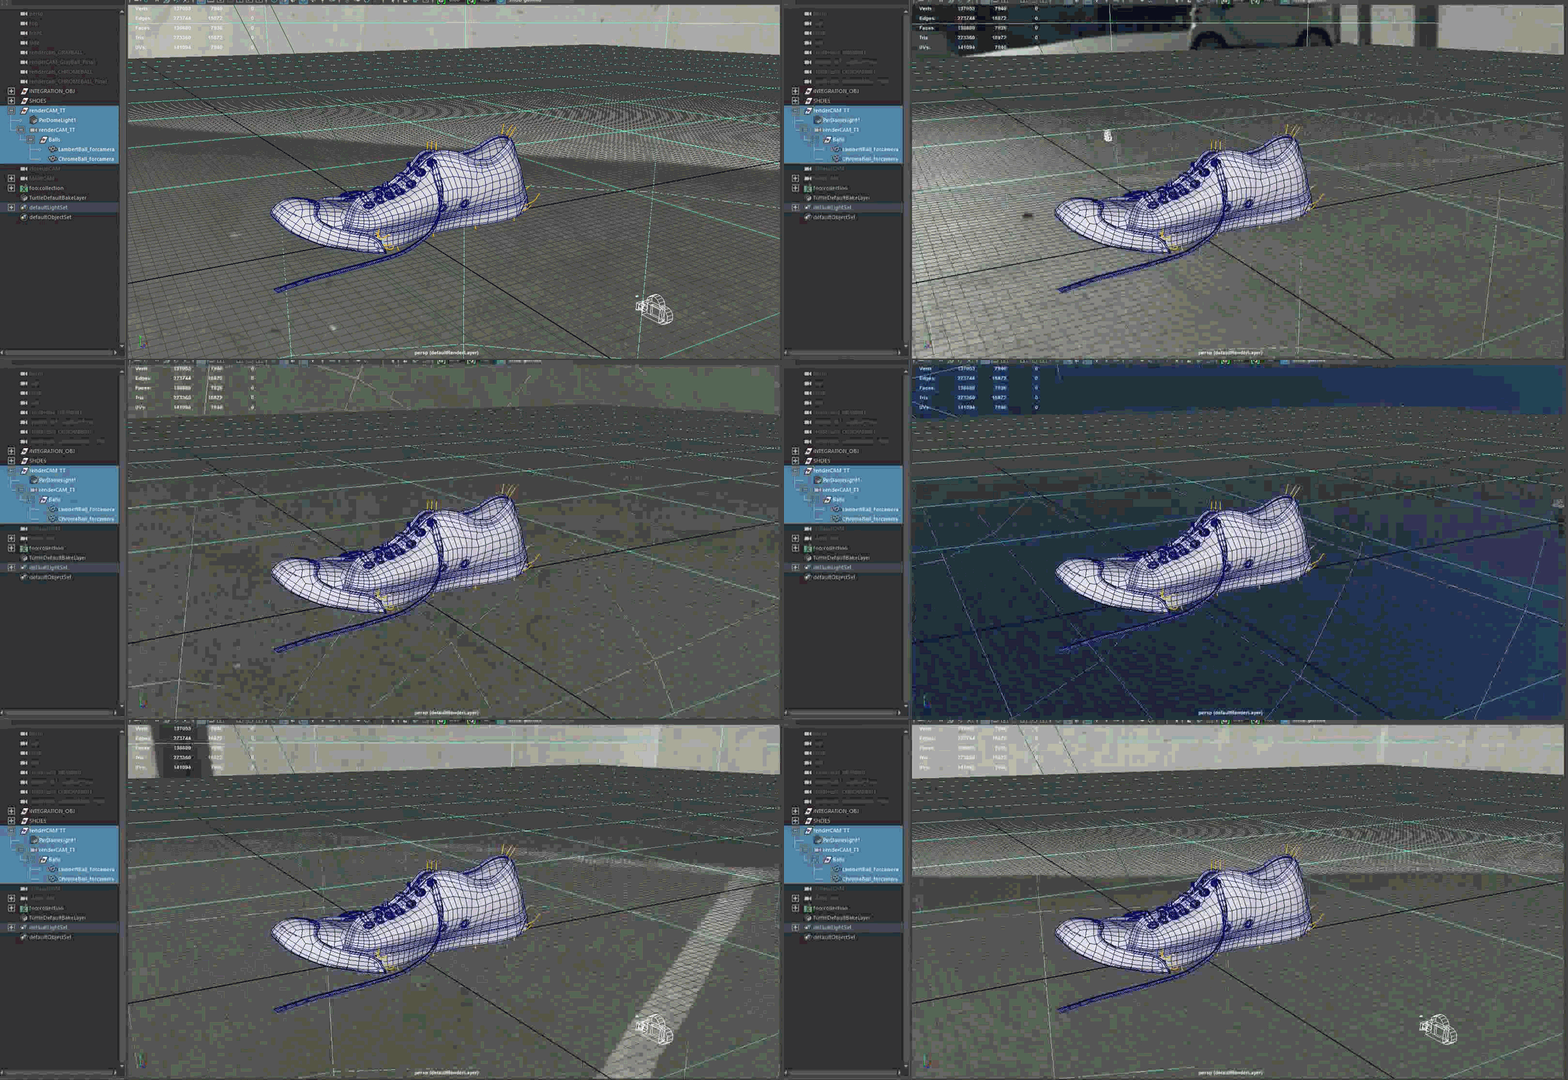
Before starting look development, I first set up my camera, so that I can just scrub up the timeline for a specific angle that I want to check. The image below is an example on how I did the turntable.
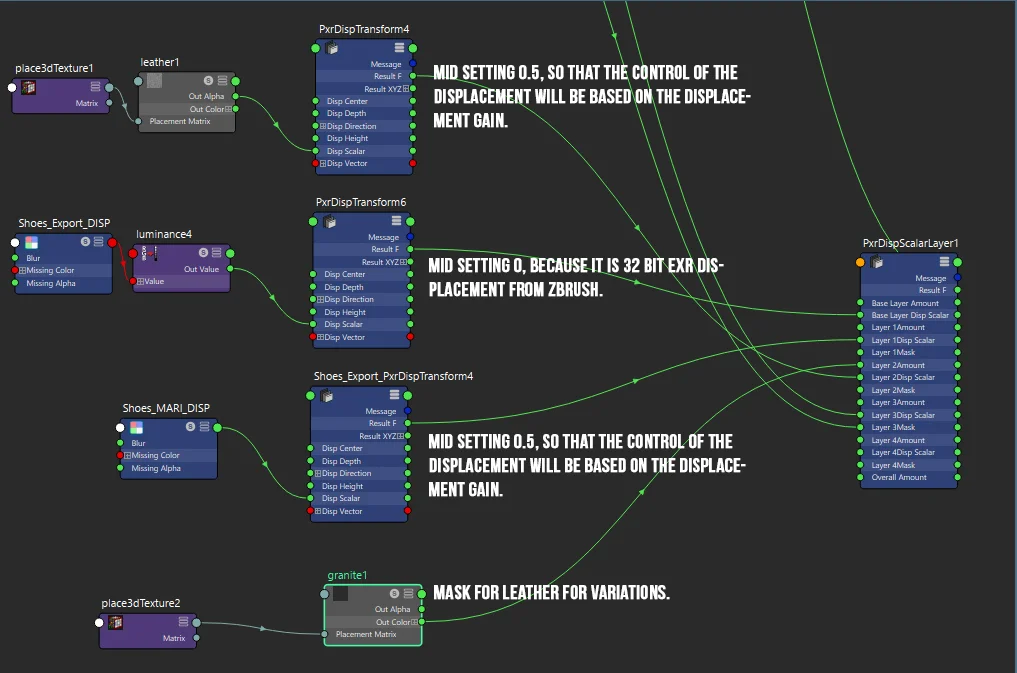
For displacement, as shown below, I combined displacement maps that I got from ZBrush, which is 32 bit EXRs, with 16 bit displacement that I made in MARI. Here is how I did it in Renderman.
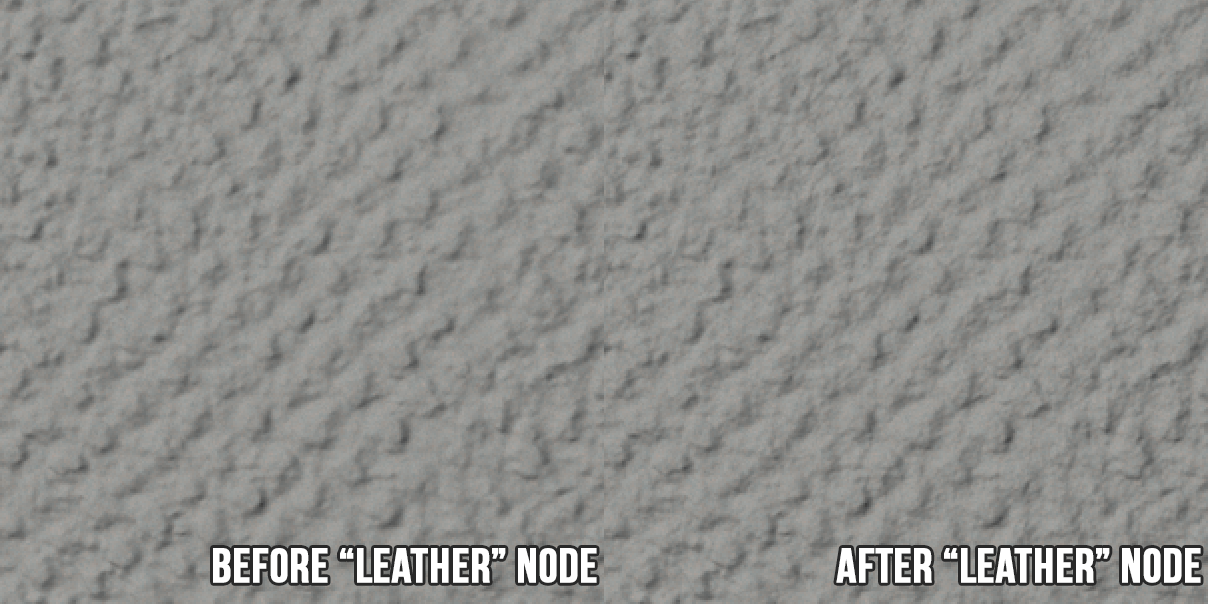
*I added a "leather" maya texture node with low opacity to help to break up the textures, since the node would add a non-tiling texture, and maintain the resolution as well.
comparison after I added maya's procedural node.
•GROOMING
All of the grooming was done in Xgen. Here is the picture below with explanations.


When I started this, I wanted to separate the fur into different parts : Main which consist of small fur, big fur for the part where it is worn out, tongue part, the broken sole area in between, and the laces.
Here is a list of reference websites that i found really helpful:
• Xgen documentation by sharktacos - here
• Xgen tutorial by Tom Newbury - here
* I found this article by Michael Cauchi after I finished the project that I find useful ! - here
*tips for Xgen : If you are doing grooming in multiple geo/description, try to add namespaces to your xgen geo. Somehow it helps Xgen not to get confused with the grooming (before I did not put any namespace in my xgen geo and somehow It did not work properly.)
05 - COMPOSITING
For compositing, mostly what I did was color correction in some of the passes, utilizing my matte pass as well. Shown in the image below.


FINAL THOUGHTS
So that covers most of the process of making this shoe project! I'm sorry if there is any method that is possibly not the best way. If so please tell me, since I am learning as well! I want to say thank you to all the people that helped me during this process, either in giving feedback or all of those really helpful articles. I would like to say thanks to Ben Dishart as well for proofreading this. I hope that this article would be helpful for you as well ! Just try to email me if there is any question. Cheers! :)

